Friday 18 March 2016

How To Match My Foundation?

                 Beauty Product Reviews
I have been asked so many times by so many people about which foundation would suit them better that I finally decided to do some research and make things easier for everyone. As it is not possible for me to tell you guys about which foundation is best for you, because when buying a foundation there are many things to consider and to keep in mind.

Firstly you have to know your complexion, then find out your skin undertones and you should know your skin type aswell. You should also know if you are applying the right type of moisturizer before foundation and whether you need any (and how much) SPF (Sun Protection Factor) in your foundation.

To determine your skin complexion intensity and your skin undertones always check in day light or light intensity close to natural sunlight. Remove any makeup you have on your skin and keep skin charts with you which you can get form the internet and print them out. Compare your skin with the charts and see which category you fall in.

So we will start with skin complexions:

Skin Complexion and skin Undertones are two DIFFERENT factors. The Skin complexions are generally categorized in to 4 different intensities that are :

1. Fair Skins
2. Medium skins
3. Tanned Skins
4. Dark Skins


Some times the categorization starts from Very Fair and may range to Very Dark but most of the time they are considered to be under 4 intensities.

As you can see in the chart above people with any skin complexion intensity can have any type of skin undertones. Knowing your correct skin intensity and skin undertones is very important for buying your foundation because if they are not in harmony you foundation might look too ashy or cakey and your skin imperfection will be accentuated.

The next step is to find out your skin undertones.

There are mainly three different types of skin undertones and they are categorized as warm, neutral and cool.

The Warm undertones are usually the skin tones which are: golden, olive, yellow, woody toned complexions.
If your skin better interacts and is in harmony with gold,yellow, orange, reds tones, WARM shades and golden jewelry makes your skin look luminous and better enhance your complexion then that means you have warm undertones. 


The Cool undertones are usually pink, rosy, beige, or brown complexions. If you skin better interacts and is in harmony with blue, rosy brown or a light rosy color, COOL shades and silver jewelry makes your skin look luminous and better enhance your complexion, then you have Cool undertones.

You have Neutral undertones if you have a balance between warm and cool undertones. Most women have neutral undertones.
Some of the makeup brands cater for Olive skin undertones separately which is very good because in this way you can get exact match to your skin and wont have to mix up foundations for the right shade.

The next step is to find out what skin type you are. The skin are generally categorized into 4 types:
1. Dry
2. Normal/Dry
3. Normal/Oily
4. Oily

It will be easier for you to determine your skin type from the picture below.

Always remember to keep you skin type (e.g Oily, Dry, Normal ) in your mind when purchasing your moisturizer which you will apply few minutes before you foundation as that matters a lot. If you have oily skin always go for an oil free moisturizer as this will prevent oily breakouts during the day and help your foundation to stay put longer. Same with dry skin, the moisturizer will help prevent dry patches through your foundation.

When you have determined your skin complexion intensity, skin undertones and your skin type, you are now ready to match your foundation. The makeup brands usually have named/numbered their foundations according to complexion, undertones and types (e.g oily, dry, normal) to make it easy for people like us. Always ask for a sales assistant/beauty adviser to help you to select the best possible matches for your skin.

Apply a tiny amount of each foundation in stripes from cheek down to your jawline. The foundation which is closest to your natural skin tone and blends in and you cant separate it form your natural color is the one for you.
Remember a foundation is not meant to make your complexion fair, its purpose is to make your own skin complexion flawless and  hide any discoloration.

People who have very fair, fair, light medium skin complexion can burn, or tan very easily from the sun so it is always advised that they put on some SPF (Sun Protection Factor). The lighter your skin colour the more SPF you need. You can use the moisturizer with SPF but it is better that you buy a foundation with a SPF fr more protection. 

Hope I solved your problems regarding how to match your foundation and it would be easier for you to get a perfect match from now on. :)


Orange Makeup Tutorial Using NEW Products Ofra Cosmetics & Beauty Junkees


Credits here: https://www.youtube.com/watch?v=5PW4VGrJ4fY

Makeup Tips, to Look Fresh

                              Beauty Oil
You need to get around to face fresh, either by traditional or cover it with make-up. Want to know the trick?
Living in city large indeed vulnerable to depression or stress. The main symptoms is experiencing difficulty sleeping. If you are tired and sleepy too, may not be able to sleep because of work that can not be abandoned. As a result, signs of fatigue will appear on your face. The face becomes lethargic and not fresh. Not only that, sometimes in circles around the eyes look black.


Well, when you still have to move, to work or meet clients. So how to make a tired face to look fresh? A salon makeup artist, gives some tips on telling to get a fresh face in the morning.

The first you need to recognize the facial characteristics are experiencing burnout. Some women are less concerned and less attention to the characteristics of fatigue in the face. As a result they do improvise makeup and less than optimal. (the nature of Skin Color Determine Makeup Colors)

Before you apply makeup, Makeup Experts say some signs of fatigue in the face. Among the emergence of a black eye bags. Eye bags caused by lack of sleep, pale skin, an interruption occurs in the form of pimples and black spots, and skin look oily.

To overcome eye circles around the eyes, Makeup Expert give you two alternatives, namely with the traditional treatment, and cover it with make-up just looks temporary. If you want optimal results, both of them should run together.

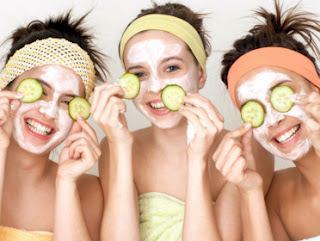
Traditionally you can compress the eye socket with a cucumber or strawberry. Both types of fruit enlargement is to reduce eye puffiness and eliminate dark color.

Perform compression when going to sleep and wake. You can put the cucumber and strawberry direct all part of the eye closed for approximately 15-20 minutes. Or you can also make cream that can be applied before sleeping and wash off when you wake up from sleep.

Able to use a piece of ice placed in a cloth containing the ice in your eyes.

While covering the eye make-up bag is done through application of concealer. Use a concealer that has a yellow base color. Color serves to neutralize dark circles under eye circles. It's easy, first use as a base foundation. Then the application can be done with the sweep concealer from the inside out.

To cover the pale skin, you could use a moisturizer to make your skin more bright and shining. Then you can apply blush on with a light brown base color that gives youthful skin effect. Without skin whitening, your skin also looks bright glow.

The emergence of acne can be prevented by cleaning the face with a foam cleanser and anti sebum to reduce oil. Basically, make a face in order to remain fresh and bright does not require a lot of make-up item. Enough with the concealer, moisturizer, foundation, and a blouse on your face already looks brighter. The fourth item is an absolute make-up you use or you take it when traveling far.

PUPA EYEBROW DEFINITION CREAM

                           Beauty Nature
EN While looking at my makeup products that I've purchased from the beginning of the year, I was trying to decide which of them impressed me the most and about which I should write in the first place. Automatically my eyes turned to the PUPA Eyebrow Definition Cream. Well, according to the original plan, I was supposed to buy the Anastasia BH Dip Brow Pomade. But, you know - accidents happen.

As in this case, I was just casually browsing the shops and *ups* - slipped into a makeup store. There I saw this PUPA thingy and thought that it looks quite similar to the Anastasia one. Plus, it costed €13, while the Dip Brow Pomade costs €20. So, I instantly made a spontaneous decision and went to the cashier. Haven't regreted a second.


EN I've been working with my eyebrows a lot recently. All my life I had them straight, but for the past couple of months I've been trying to re-grow them and re-shape, so that they would have a more visible arch. The work is still in progress, but I can already see a positive effect. Of course, where natural features fail, makeup comes in hand, as it happened with the Eyebrow Definition Cream.

As long as I remember myself I've been using eyeshadows to fill my eyebrows, but this time I wanted something harder duty. And I think, I've found what I've been looking for. This PUPA product is basically a gel liner for your eyebrows. The color no. 003 is a perfect shade of dark brown, not too orange, not too cold.


EN Of course, you have to be very light handed with this thing, otherwise you'll end up looking with eyebrows as drawn with burnt matches. But, if built slowly, picking a bit of product at a time, the result will be fantastic. As you might have understood, the cream is very pigmented, that's why eyebrows become fully filled, defined and flawless looking. Literally flawless.

Wished about those Youtube-beauty-guru type of eyebrows? Well, this is it. Even my friend, when I met her, said that my eyebrows look like from Youtube. Is there any need for more arguments? You can do whatever you want - draw straight eyebrows, create an arch, fill in gaps... I strongly suggest trying this PUPA Eyebrow Definition Cream or at least something similar to it. Because I'm strongly in love. And this is a game changer. Once tried, one can never go back to simple eyebrow eyeshadows.

Facial Rejuvenation - Fractional Radio Frequency & Dermal Stamping Experience

                            Beauty Master
I have been in denial over the past few months about the fact I am now a “grown up”. Along with the mountain on responsibilities I have to accept (being in charge of my own bed time with Netflix and YouTube existing is a terrible idea) I now have to face facts and accept my skin isn't what it used to be.  Fine lines are large pores are have somehow snuck up on me so when I had the opportunity to receive a complimentary Facial Rejuvenation treatment at the Laser Clinic Australia upon my recent visit to the Sunshine Coast I jumped on it.

The treatment combines fractional radio frequency to stimulate the production of new collagen fibres and elastin, with dermal stamping to encourage the skin to repair itself resulting in healthier looking skin!

My main concern before this treatment was the whole idea sounded painful to me, so the first thing I want to inform you all on my experience is that it wasn't! There were some slight prick feelings on my forehead and cheekbones but other than that it felt like someone was repeatedly poking me in the face with the fine tip pen. Now on to the treatment.

First off a numbing cream is applied all over your face, which took about half an hour to work. Also something to note, it took about 2 hours for the numbing cream to wear off. This can make eating and a little strange! Once the numbing cream has set in the Fractional RF and dermal stamping takes place using a little handheld device moved over the skin. 

There is no bleeding with this treatment and only signs I had anything done are little imprints from the device and some redness, both of which go away after an hour or two. Once the redness was gone, my skin looked pretty much the same. It was the next day when the magic really happened. 

Once I woke up and cleansed my face I noticed a huge difference in the texture of my skin. Before the treatment my skin had been quite dull and kind of rough in texture, but now it felt so incredibly soft and gained a healthy colour to it. My pores and fine lines looked less obvious as well but it was the texture and colour that really blew me away. 

It’s recommended you receive 4-6 treatments to see maximum results; I only had the one but am sure I would have seen great results with my pores and fine lines if I had continued! Even though I only had the one treatment I am very happy with the results. 


Beauty Blender Basics | How to Clean Beauty Blenders


Visit here for more info : https://www.youtube.com/watch?v=lID7S6VLi4M